Showing posts with label polymer clay. Show all posts

1/20/13

Choco Eclair Squishy-Inspired Charms

I love making  pastries and very realistic polymer clay charms so I really wanted to replicate the new Choco Eclair squishies.
They were actually pretty easy and super fun to make and experiment with.

These charms started out as plain, unshaded, textured pieces. I used light brown clay as a base color. To get the vibrant yellow and orange colors that the actual squishies, I had to use paint because chalk pastels would not do the job. After baking, I coated the french loaf and sesame bun charms with a light yellow paint. Afterwards, I darkened the yellow paint by adding a tiny bit of tan paint and coated the charms with that. Then I darkened certain spots for the "baked" effect. After the painted dried, I added the sesame seeds (made with translucent clay) with layers of gloss glaze. Finally, I coated the entire charm with about 3-5 layers of glaze to ensure the paint and sesame seeds stayed on.
For the donut, I just used chalk pastels for shading, but afterwards I realized I should have used paint because the colors were not vibrant enough. The "powder" was made with white acrylic paint and a ball point tool.

CLICK [HERE] TO WATCH THE VIDEO FOR DETAILS


12/30/12

Toast with Jam Polymer Clay Tutorial


TOAST
You Will Need:
light brown clay
white clay
translucent clay
texturing tools (sandpaper, tooth brush)
shading tools (chalk pastels, paint brush)
ball point tool (or toothpick)
a cutter (i.e. blade, x-acto knife)
rolling pin


- Mix the colors of clay, roll into a ball, and flatten out to desired width using a rolling pin
- Outline the shape of your toast using a ball point tool or a toothpick
- Cut out the shape using a blade or x-acto knife and smooth out the edges
- Texture the toast with sandpaper or and old toothbrush on the front, back, and the edges (for a more realistic look use a ball point tool to texture the front of it, making small indents throughout)
- Shade the edges and the back of the toast using brown, orange, and yellow chalk pastels
-Stick and eye pin in and secure it.
-Bake and you're done!

JAM
You Will Need:
triple thick gloss glaze
red paint (acrylic, watercolor, etc)


- Pour out a small (depending on the size of your toast) amount of glaze onto a piece of card stock paper or wax paper
- Put a drop of paint into the glaze
- Mix together well and apply it to your toast (after it has been baked)
- Wait for it to dry and you're done!


12/29/12

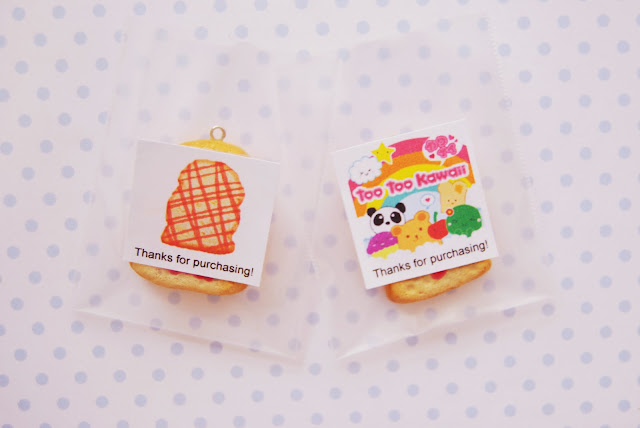
TooTooKawaii Squishy Replicas

These charms were inspired by Amy's (tootookawaiishop on youtube) original squishy designs.
The squishy comes in four different designs, which you can view on her online shop @ tootookawaii.com
I made some cute little baggies to put the charms in, like an actual bakery.

AMY'S YOUTUBE CHANNELS:
AMY'S STORE:

12/17/12

Charm Update - Clay Pastries

I put my Kutsuwa molds to use!
I had a hard time using them at first. The clay got stuck to the molds and it was just a mess. After letting them just sit on my desk for a couple days, I decided to wash them and try again. The second time, they turned out a lot better and I got used to working with them. They're actually really fun to work with, but a struggle to get the clay out of the molds.
I really like how they turned and I can't wait to make more!
WAFFLES, DONUTS, & CHURROS
Which is your favorite?

11/23/12

Packaged Charms!

My newest charms!

Cafe De N Eclair Squishy-Inspired Charms

Unlike my previous charms and replicas, these charms were made with pluffy clay instead of polymer clay. Pluffy clay is a soft, fluffy modeling clay. Like polymer clay, it never dries out and is baked to harden. Pluffy clay is a lot softer and lightweight than polymer clay and it can get sticky while you're working with it.

These charms were fairly easy to make. It was my first actual time making charms with pluffy clay and I think they turned out well.

Watch the video for a closer view on the charms!

tutorial coming soon!

9/15/12

Hello Kitty Donut Squishy Replica

Another replica! I'm still obsessing over these adorable hello kitty squishies. I bought another one from decoden-acc.com and decided to do another replica since people enjoyed my last one.
Here is the actual squishy:
...and here is the replica!
 This one was fairly easy to do and didn't take me as long as my last one. I started by making the graphics for the tag using a photo editing software called Photofiltre, then I made the graphics for the back.
I made the charm with polymer clay and used brown liquid clay for the chocolate drizzle.

Here is a side-by-side comparison of the actual squishy and the replica:

9/1/12

Rare Hello Kitty Squishy Replica

I've been wanting a hello kitty squishy for forever and I finally got one to add to my squishy collection. I purchased it from decoden-acc.com. She has amazing prices and the cutest squishies.
This is the one I bought:
Her shipping price is great and you get your items super quick. Every purchase also comes with her adorable business card :)

Before receiving the package, I decided to make my own replica of it!
I made the actual charm, or "squishy" with polymer clay. I used dark brown and black acrylic paint for the "chocolate drizzle" and used triple thick sculpey glaze on top of it. I attached a black cellphone strap fom hobby lobby onto it to give it the full effect of a real squishy.
For the packaging, I used a small resealable bag I got from Hobby Lobby. I made all the graphics from scratch using my favorite editing software called Photofiltre. I started off by making the pink and brown striped background, then added the text on. I got the heart, tea cup, hello kitty head, and hello kitty bow from google images then edited them by resizing, cropping, changing the color, etc. to make them resemble the ones on the actual squishy package.
For the label with the barcode, I actually just scanned the one on the actual squishy and then edited it on the computer to fit. The red label, however, was made with Photofiltre. The official Sanrio tag is from google images.

Here is a comparison of the actual squishy and the replica:
I'd say it turned out pretty well. The graphics aren't as vibrant, but there's nothing I can do about that. The polymer clay charm itself is nice, though :)
This was extremely fun to do so I might make more of these!

7/25/12

Polymer Clay Deli Sandwiches

These are my newest polymer clay creations, and once again, completely inspired by Toni Ellison. She is  seriously my favorite crafting youtuber and is so inspirational. I could sit and watch her videos for hours! I used her video tutorial to make them.

Close up shots:
Turkey and Bacon Sandwich
I will probably turn them into earrings.

Peppered Steak Baguette Sandwich
She used some kind of crafting dirt for the black pepper on the meat, which I don't have, so I substituted it with actual black pepper mixed with black chalk pastel. The sandwich didn't turn out perfectly because you can't see all of the cheese from the front of it.

front
back

Corned Beef and Swiss Sandwich

Poppy Seed and Cream Cheese Bagel
She also used the crafting dirt for the seeds on the bagel, instead I just cut tiny bits of black clay and placed them on top.
I might turn the bagel into a ring.

The pieces aren't perfect, but this was my first try, so I'll definitely find ways to improve and try out different techniques and experiment.

7/13/12

Squishy-Inspired Polymer Clay Charms

This video is about polymer clay charms that were inspired by squishies! The squishy photo references are from different YouTube videos and google, but mostly from Kawaii-Land.com.
I tried my best to make the charms look a lot similar to the actual squishies.
Here are some photo examples:


I would say it took about a month to finished all the charms (over 30!). I got frustrated a lot because I always mess something up or ruin a charm or have it not turn out the way I want it to. I contemplated not completing them at all but I'm relieved that I am finally finished with them and I'm pretty satisfied. Despite the negatives, they were actually really fun to make!

Polymer Clay Miniature Sweets - Candy & Desserts

This is a video of some miniature food that I made with polymer clay. You could also consider them re-ments. They were really fun to make and didn't take much time either (about 2 days). They are smaller than your finger nail and each individual piece is handmade, textured, shaded, etc. However, the extras (tea set dishes and clothes) were purchased from Hobby Lobby.

A few shots of the finished product (which are viewed in the video as well)

Like many of my creations, this was inspired by Stephanie Kilgast on flickr.